Atomic Figures in Blender (Tutorial)1
by C. Reimer
Creating figures and diagrams for your work can be quite a rewarding activity, and it helps to know some tricks for making visualizations vibrant (yet simple).
A short time ago, I had the opportunity to assist one of my colleagues, Conrard Tetsassi, PhD, with representing an atomic system using Blender, the free 3D everything-software. The process was recorded so I could send it remotely, and with permission I am able to share it right here in this post. Let’s begin by making sure you have Blender installed and have activated the atomic Blender add-on. If you haven’t installed Blender before, make sure to get the program from the official site.
Open Blender with the add-on enabled and you will see a grey landscape with a single cube in the middle of it. For newcomers, I recommend taking a minute to familiarize yourselves with the interface controls via mouse and keyboard. When you are comfortable with the Blender UI, you can click on the cube and press ‘H’ to hide it, or use the ‘Delete’ key to remove it entirely.
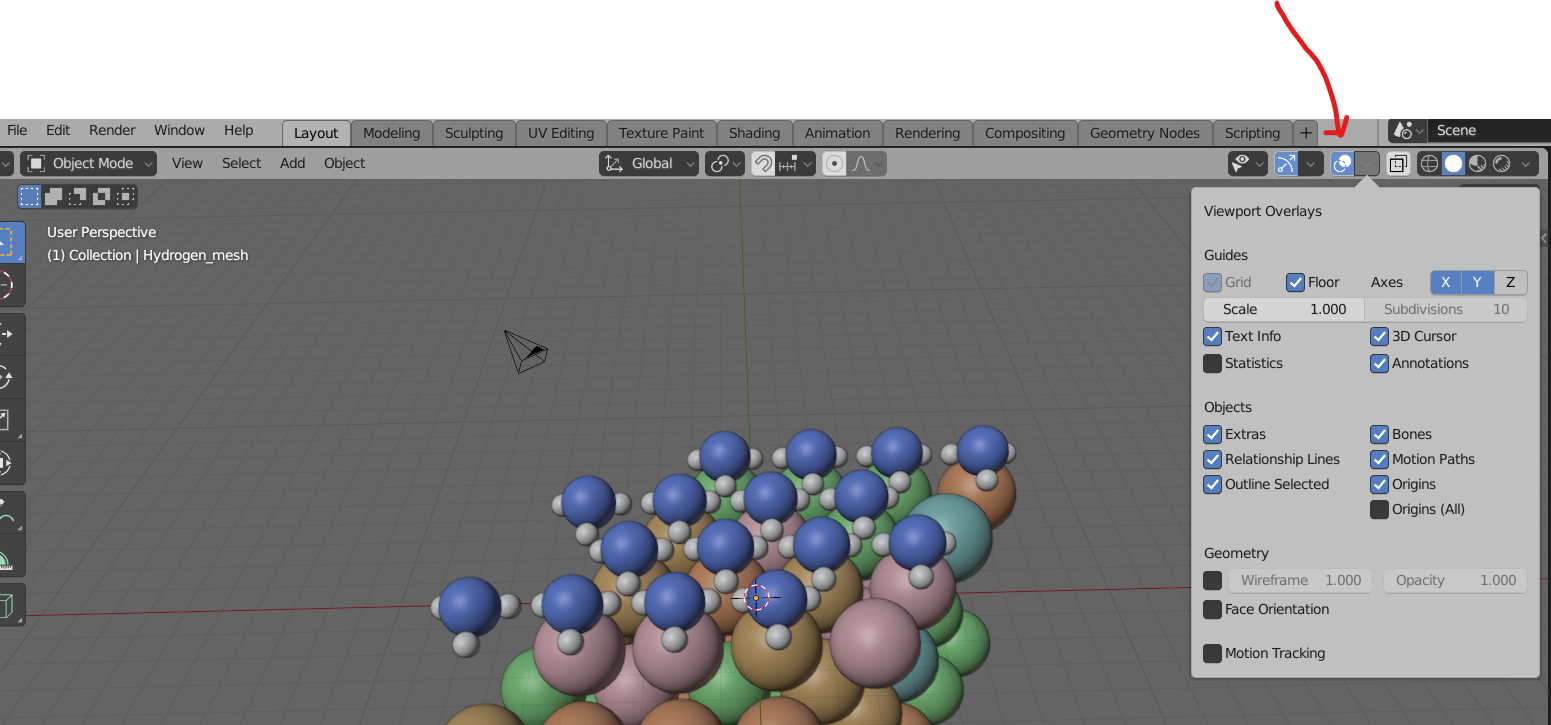
Next, at the top left, open the menu ‘File’ –> ‘Import’ –> ‘XYZ (.xyz)’ and find the desired atomic file on your computer. With the XYZ file open, your atoms should be visible and you can access the overlay controls at the upper right of the layout screen to turn off visual aids that you don’t require for a clean figure (grids, axes, etc).
With the scene mostly ready, let’s take a minute to familiarize ourselves with the camera controls. This video covers the basics, which are explained step-by-step below. Lighting and rendering is covered in another video at the end of this tutorial.
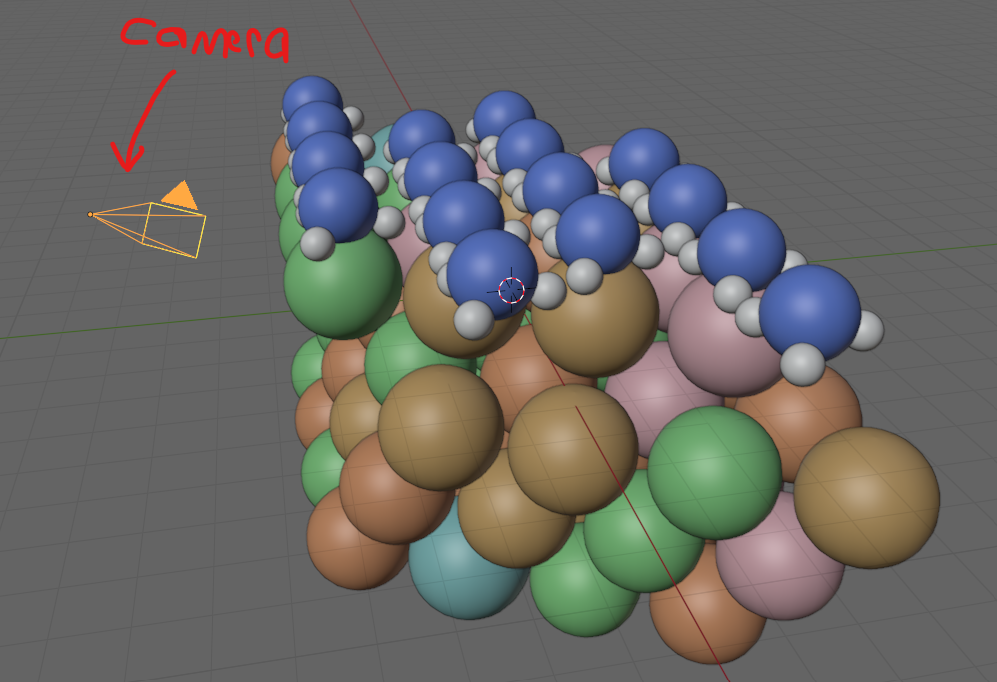
- The camera can be selected by clicking on the wire-frame aperture hovering near your atoms or from the menu on the right-hand side of the screen. The camera can be adjusted using the move (‘G’) and rotate (‘R’) options, with ‘X’, ‘Y’, and ‘Z’ keys locking transformations to a particular axis.
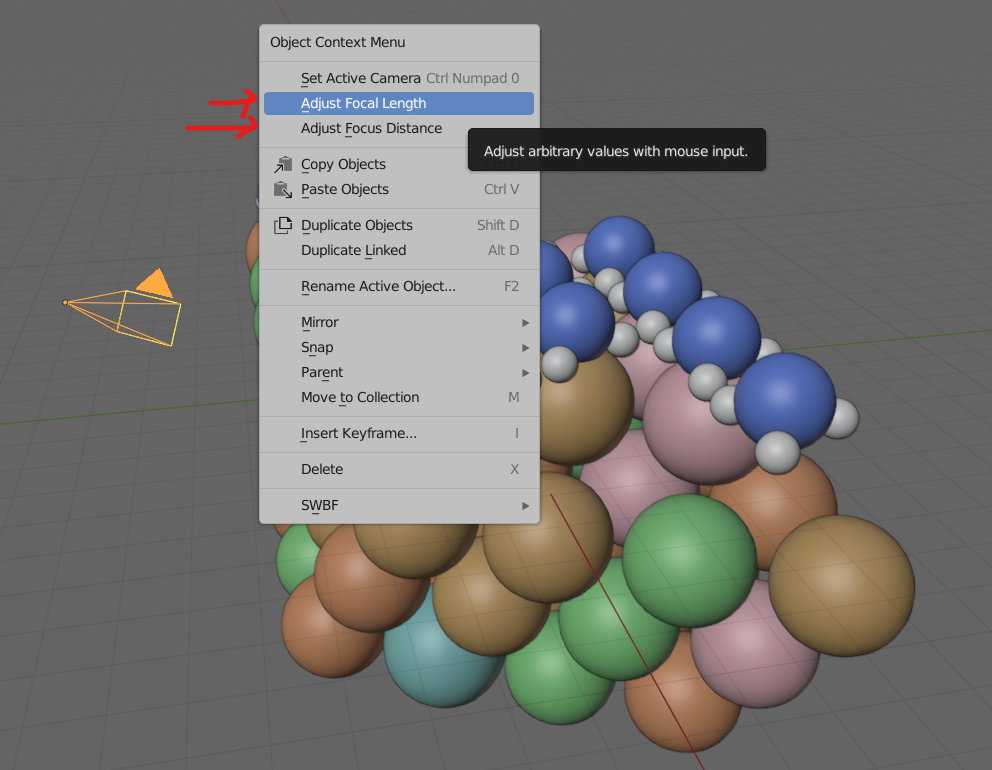
- Right-click while the camera is selected and a menu will appear with two options for adjusting the camera, ‘Adjust Focal Length’ and ‘Adjust Focus Distance’. Change these to your satisfaction, and then select ‘Set Active Camera’ to make this the camera that pictures will be taken from.
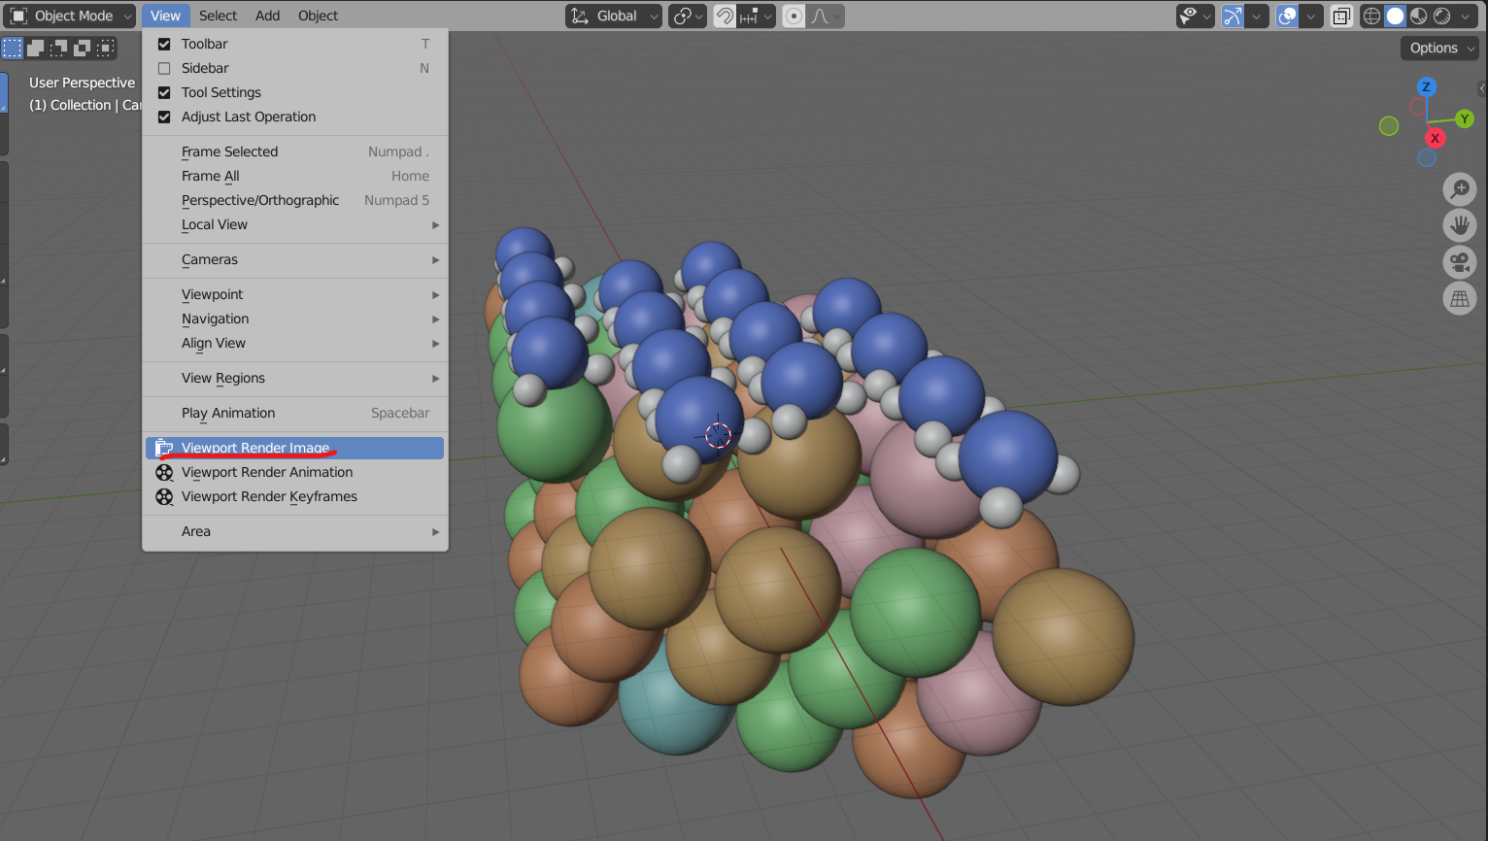
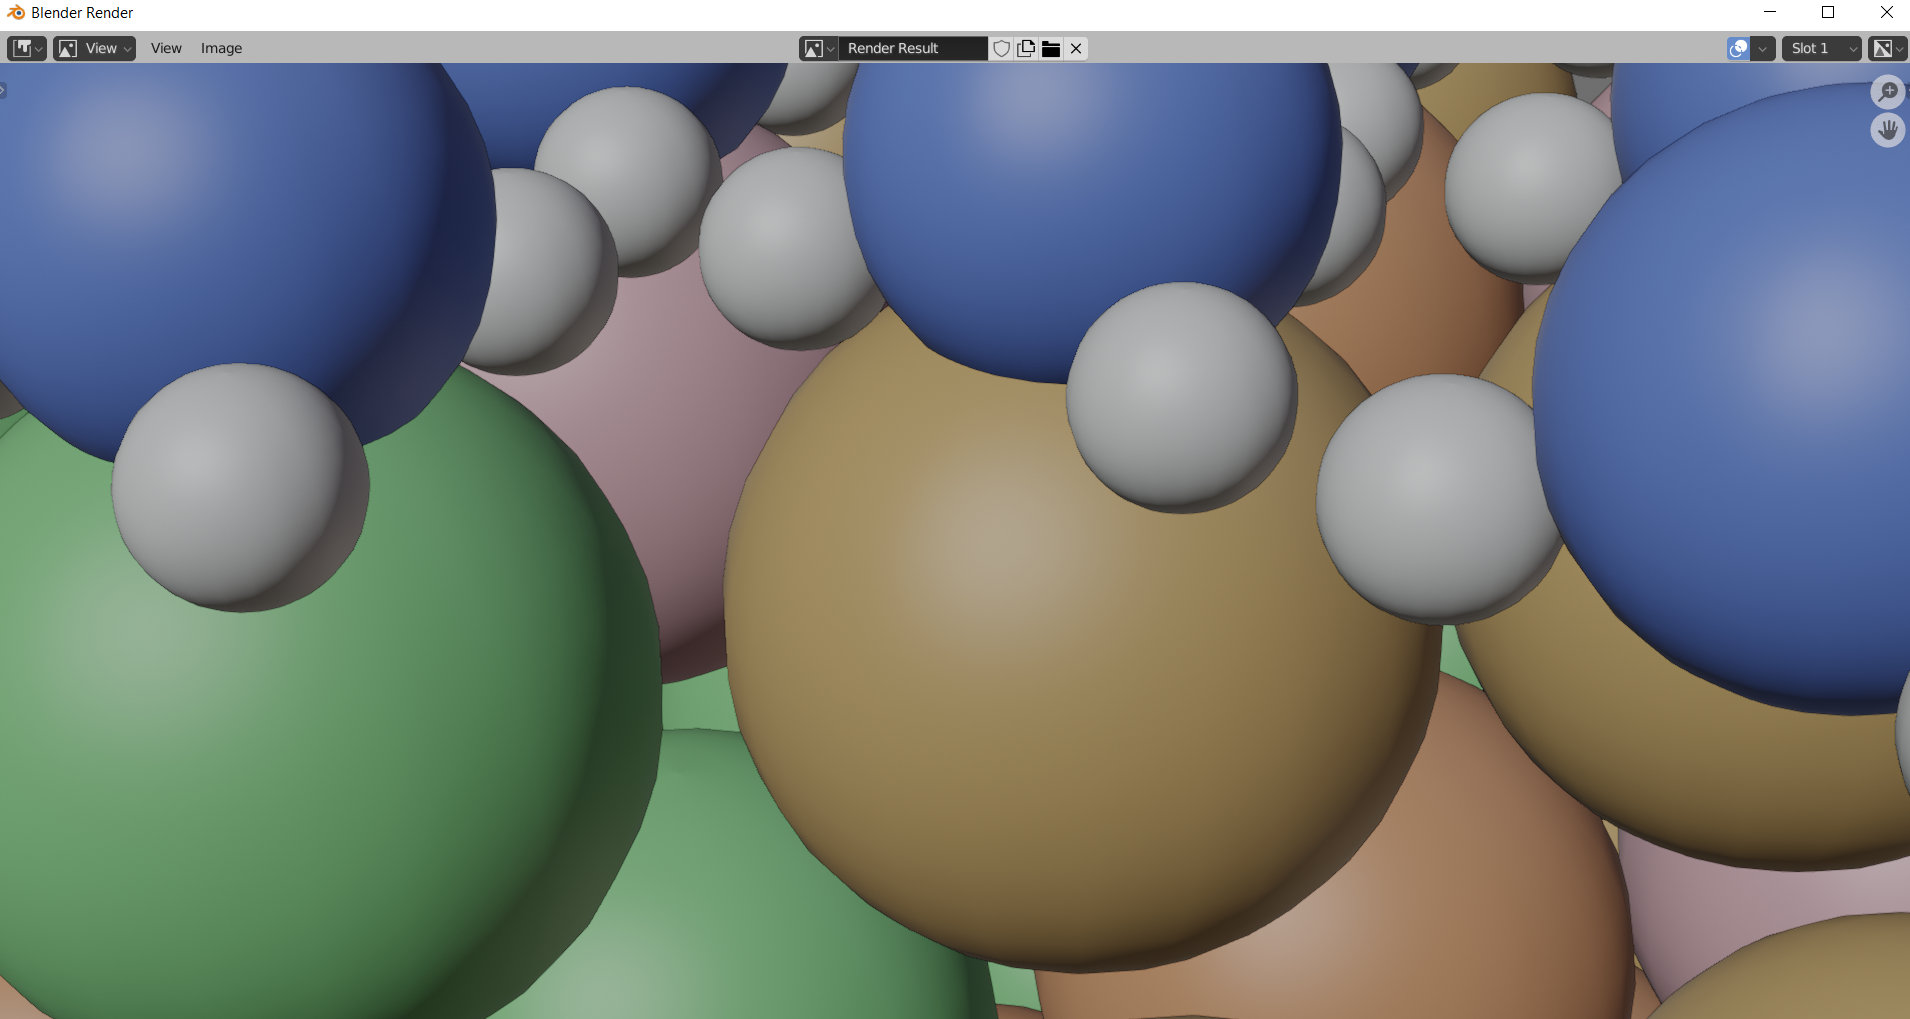
- With the camera setup done, open the ‘View’ drop-down menu at the top of the screen and select ‘Viewport Render Image’, which will open a new window that shows the rendered view through the camera.
- In the render window at the top left of the screen is an option ‘Image’ –> ‘Save as’, which will allow you to save the render in your preferred file type and location. If your camera is too close to the target you can close the viewport render window and adjust the camera before trying again.
Now that you are able to take a photo in Blender, you may want to replace the background or change the lighting. Blender has a staggering array of lighting types and interactions. However, detailed lighting is only applied at certain rendering viewports, so switch over to those as in the video below.
I also added a ‘Plane’ mesh object placed underneath as a background (like a sheet of paper) and assigned it a new white ‘Material’ in the ‘Material Properties’ panel for contrast. Lastly, the material was given the ‘Surface’ –> ‘Background’ property to get rid of any shadows that might land on it from the atoms themselves.
Remember, a picture is worth a thousand words.
-
Originally posted on my LinkedIn on December 4th, 2023 ↩